


One of the primary tools for an urban designer is a physical model of the urban fabric you are investigating and designing. During my tenure of teaching urban design, we went through the gamut of model constructing models at the urban scale. Prior to CAD programs all models were completely fabricated by hand, with the advent of computers though it’s now possible to construct model parts on machines. This entry will look at some pre-computer models, what file types you’ll need to produce the model, discuss three mechanical options for fabrication, and end with a few recommendations.
Conventional Handmade Models
The act of building scaled city models is not confined to the twentieth century. Some of the early models of cities were created by Vauban, a military engineer at the service of Louis XIV. During his career he designed fortifications for both new and existing cities in bounding territories of France.

(12 of Vauban’s fortifications are list as World Heritage Sites)
In the early 1920’s Le Corbusier proposed a design to totally demolish and rebuild central Paris. Titled Plan Voisin, the plan called for towers in a park. The model is somewhat abstract in how it dealt with the existing fabric of Paris, abstracted as flat.

Another early example is the architectural model of Ancient Rome. Built circa 1934 by model maker Piero di Carlo, the model is housed in the Museum of Roman Civilization, in the suburb of E.U.R. just south of Rome. The sizeable model is viewed from above and is housed in a large room.

These early models were typically built out of sculpted plaster, and wood.
In the US it was conventional to build urban scaled models solely out of wood.
During the 1990’s reconstruction of unified Berlin a large-scale model was built to show the existing structures versus the new, shown in a darker material.
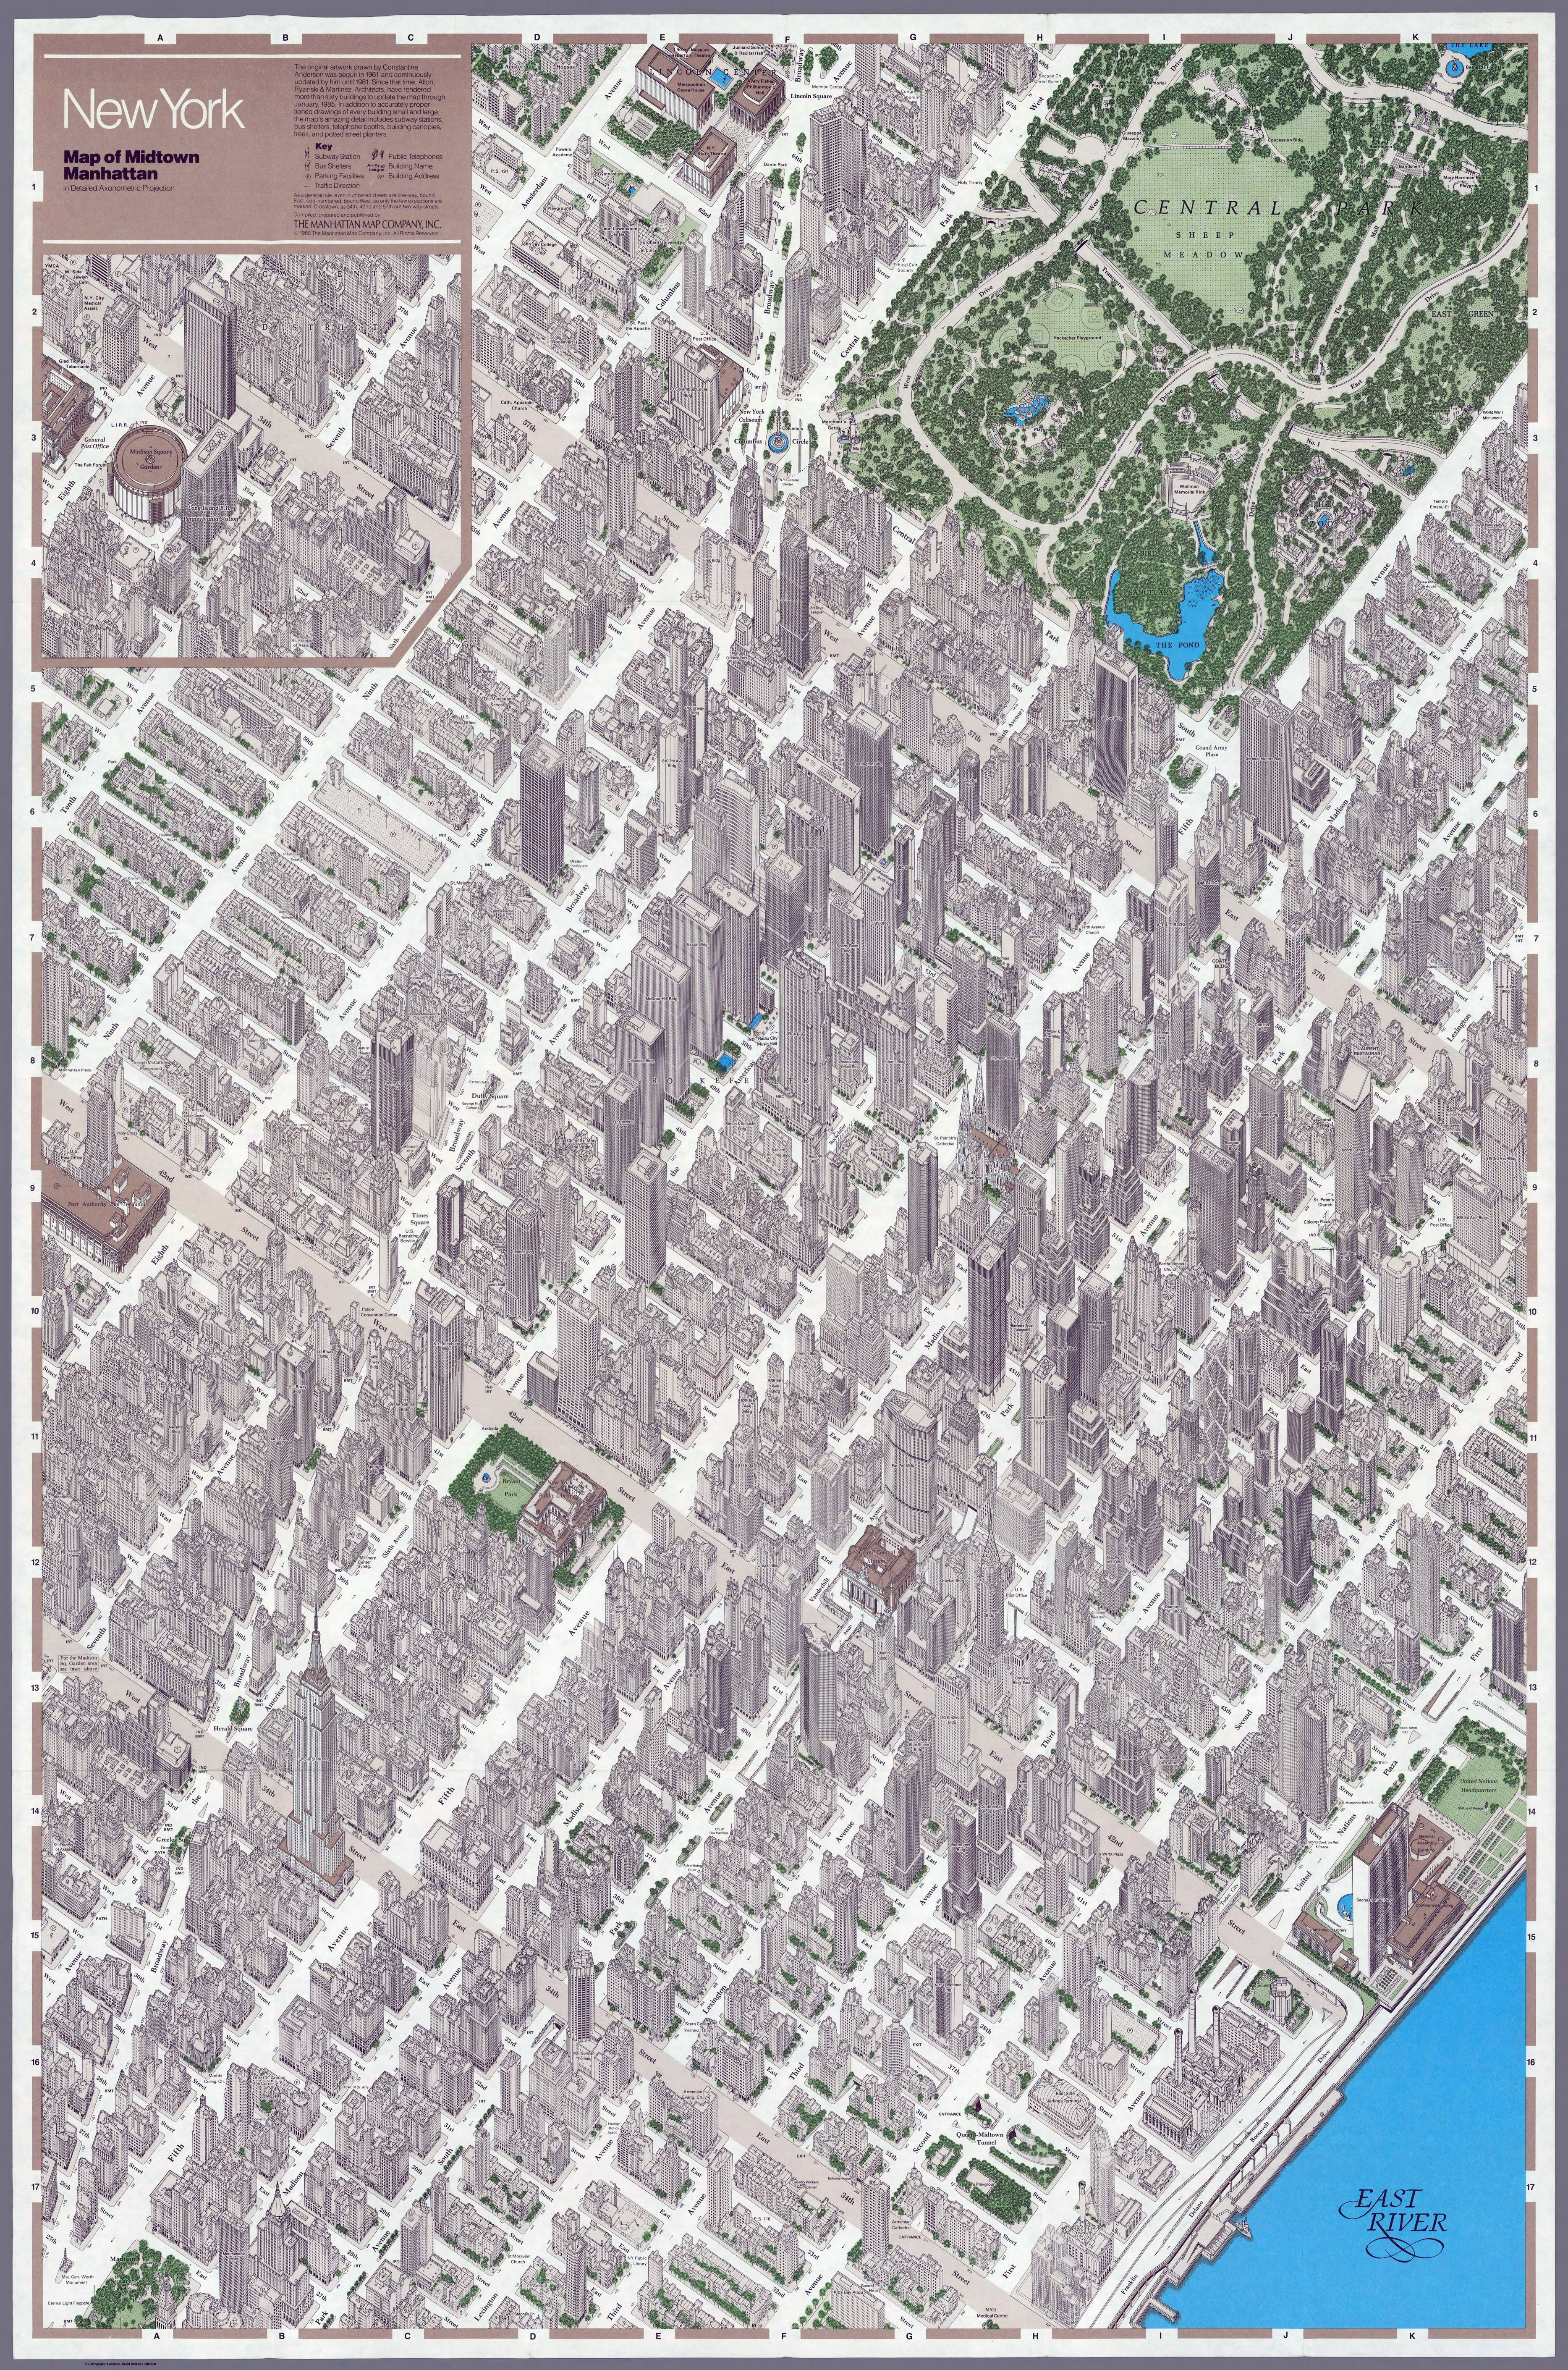
The majority of the data needed to construct these earlier models was gathered and then drawn by hand. Below is an axon drawing of midtown Manhattan constructed in the 1980’s.
Machine Made Models
With the advent of computer aided design tools, the gathering of building data and the construction of 3d urban models began to change. The use of a computer to drive lasers for cutting models, computer driven CNC routers, and 3D printers greatly speeded up the model making process.
In 2015, while completing her master’s in architecture, Nikki Onderstall created this Cape Town model with the use of a laser cutter.

Shown below is another example of a laser cut model.

This same model can also be produced via the use of a CNC router, as shown below.


Information on the three models shown above can be found here.
3D printing is also being used to produce urban scale models.

The model above is produced by a professional model making company called 3D City Models. 3D printing presently tends to be limited by the print-base size. In the image below, you see both the final assembled model to the left and on the right red dashed lines showing where the model was pieced together.

The Process of Constructing 3D Models in a Computer
All computer driven machines used to produce 3D models are run by computer files. A common way to produce the base 3D file is to scan and then trace over a map in a 3D CAD program. Once the outlines are constructed you are able to project the buildings to a a given height. This can be very time consuming. Below is a sample map that was scanned, traced over and projected, using a program called SketchUp.


Web Sites Available for Cities Drawn in 2D & 3D CAD Format
There are web sites that allow for 3D building data to be downloaded. Some of these are free, while others ask for a one time payment or subscription. An excellent web site for obtaining 2D Urban data is called SCHWARZPLAN.eu. The Schwarzplan.eu site has one of the largest collections of urban centers found on the web. The majority of their city plans are free to download, and the data is available in layers, as shown in the image below.

There are number of web sites where 3D urban data can be found. The majority of this data was originally created as a GIS (Geographic Information System) file. One place to find the GIS data is Open Street Map. OpenStreetMap powers map data on thousands of web sites, mobile apps, and hardware devices. The free site is built by a community of mappers that contribute and maintain data about roads, trails, cafés, railway stations, and buildings, all over the world.
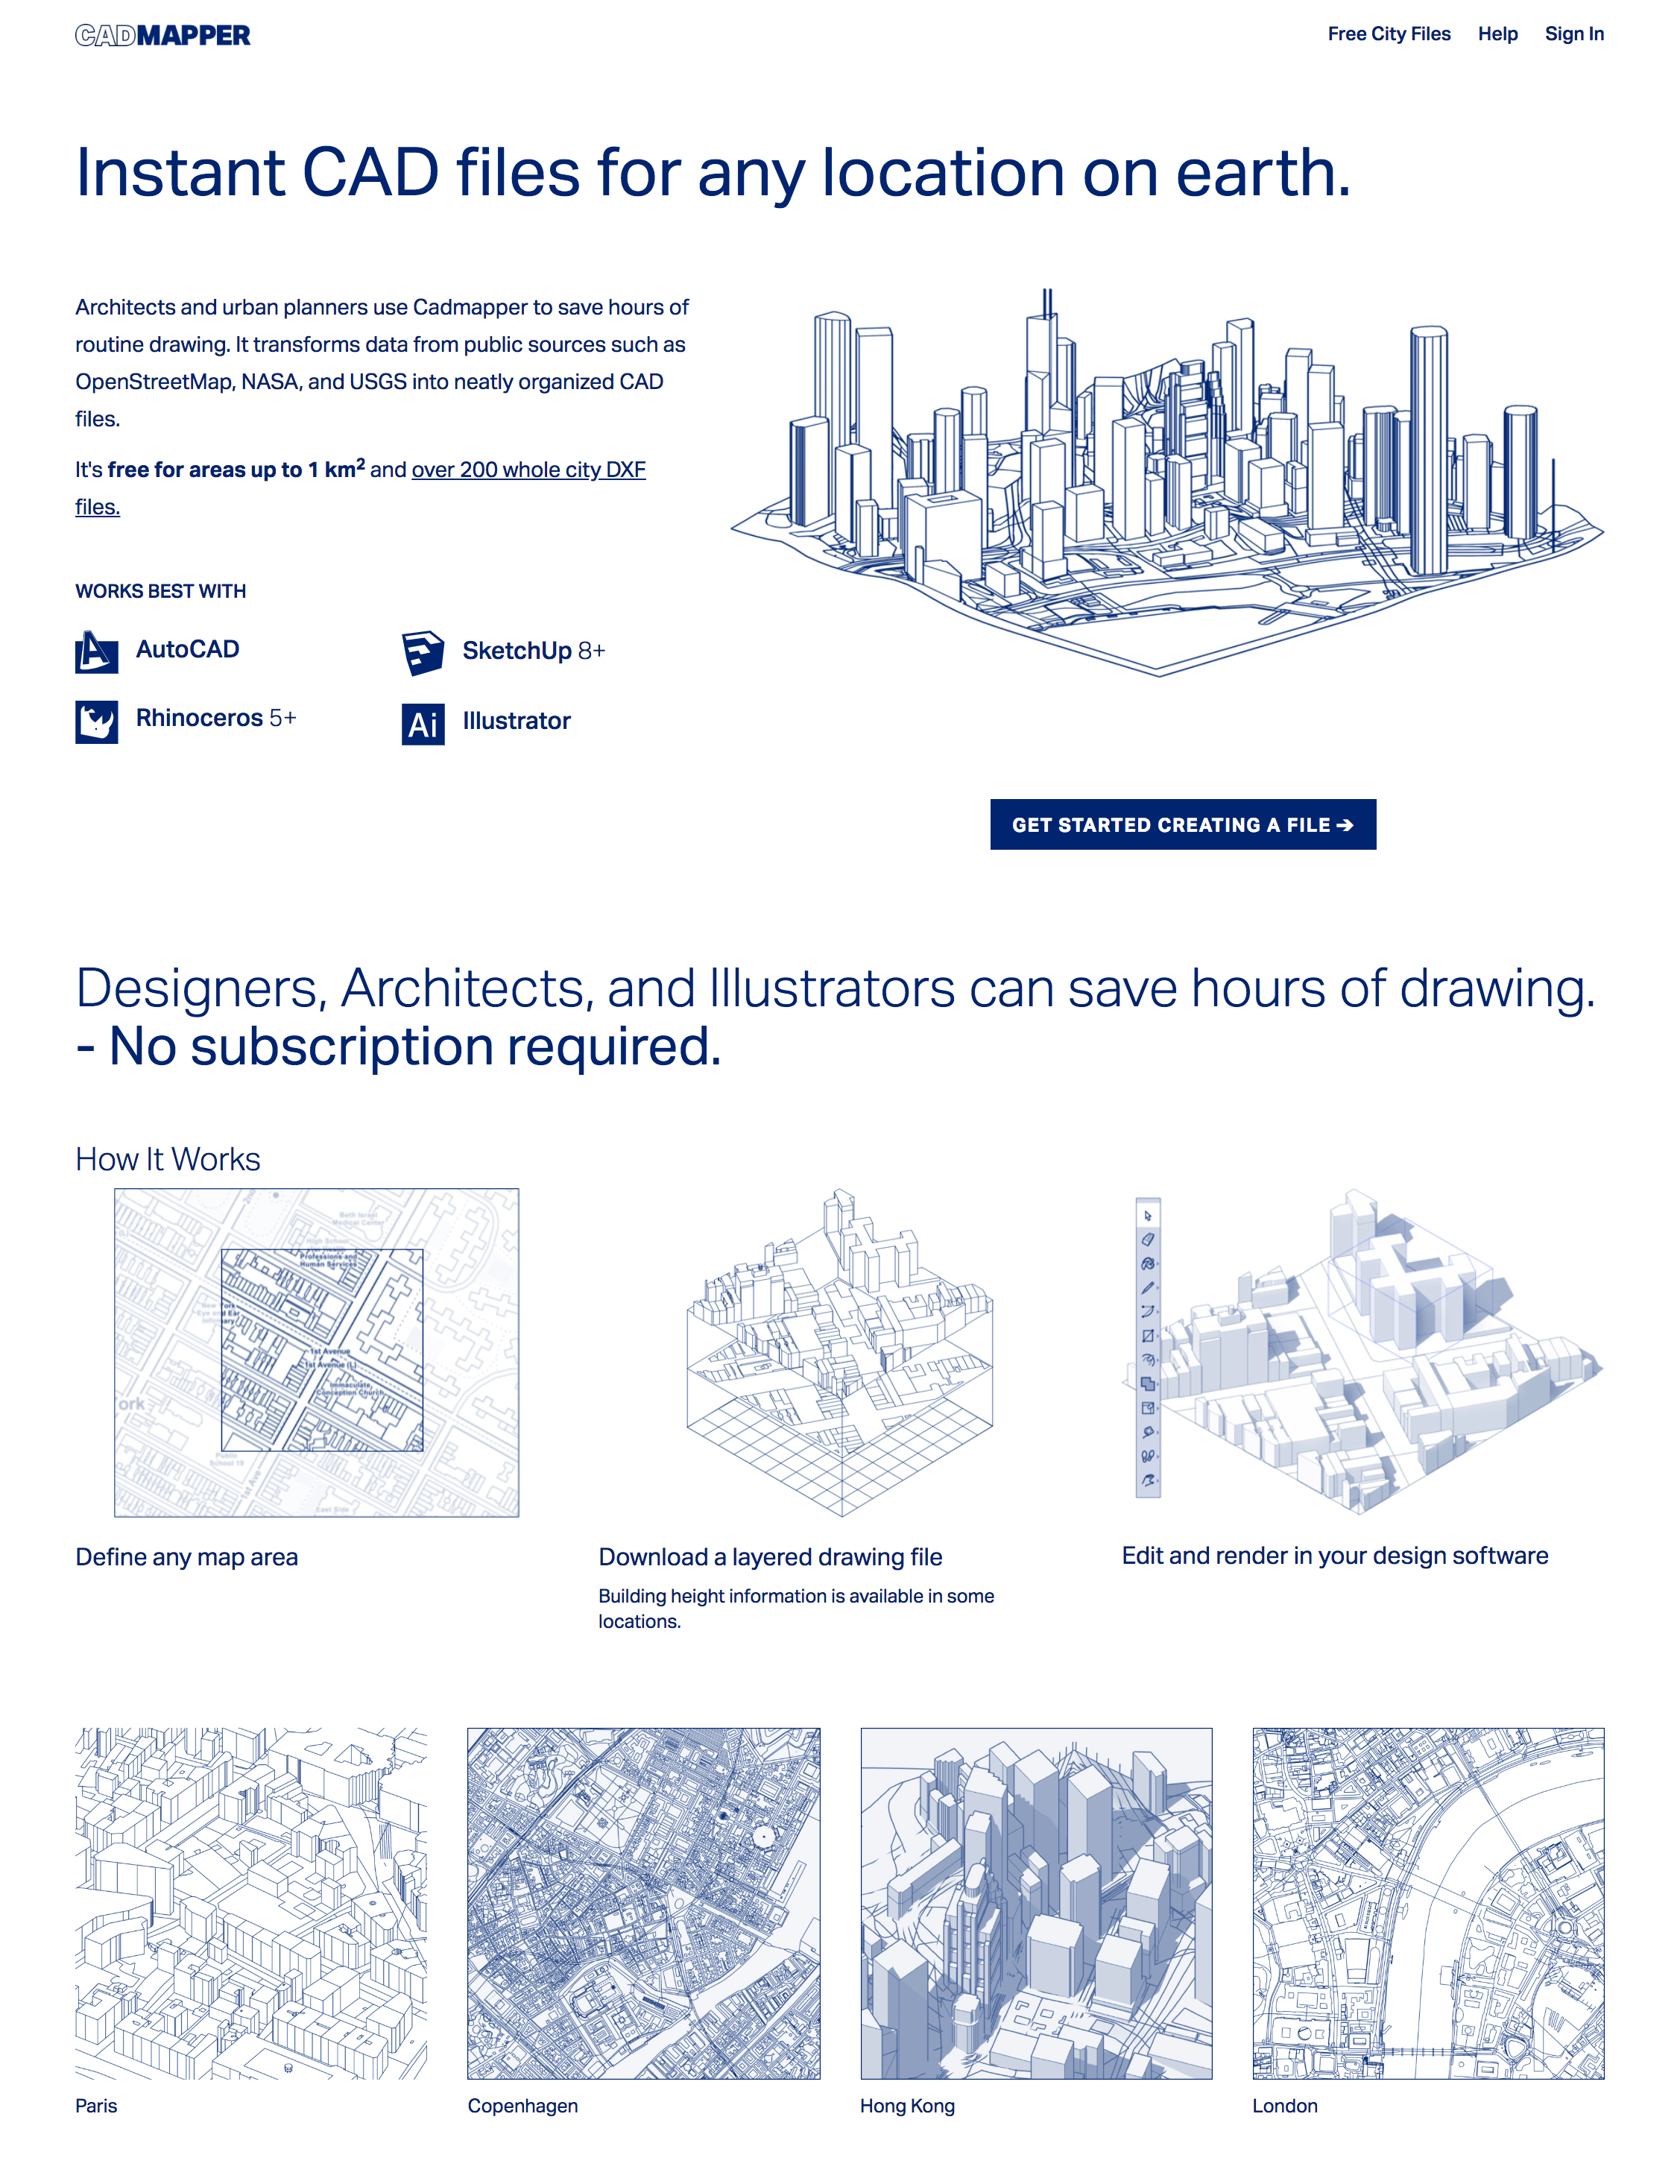
A site that then uses this data is Cadmapper. Cadmapper provides free downloadable 2D and 3D files up to 1 km2. If you want to download a larger area you are charged a fee. The downloadable formats are AutoCAD, SketchUp, Illustrator, Rhino, or (.DXF).
Preparing Your Files for Automated Machinery
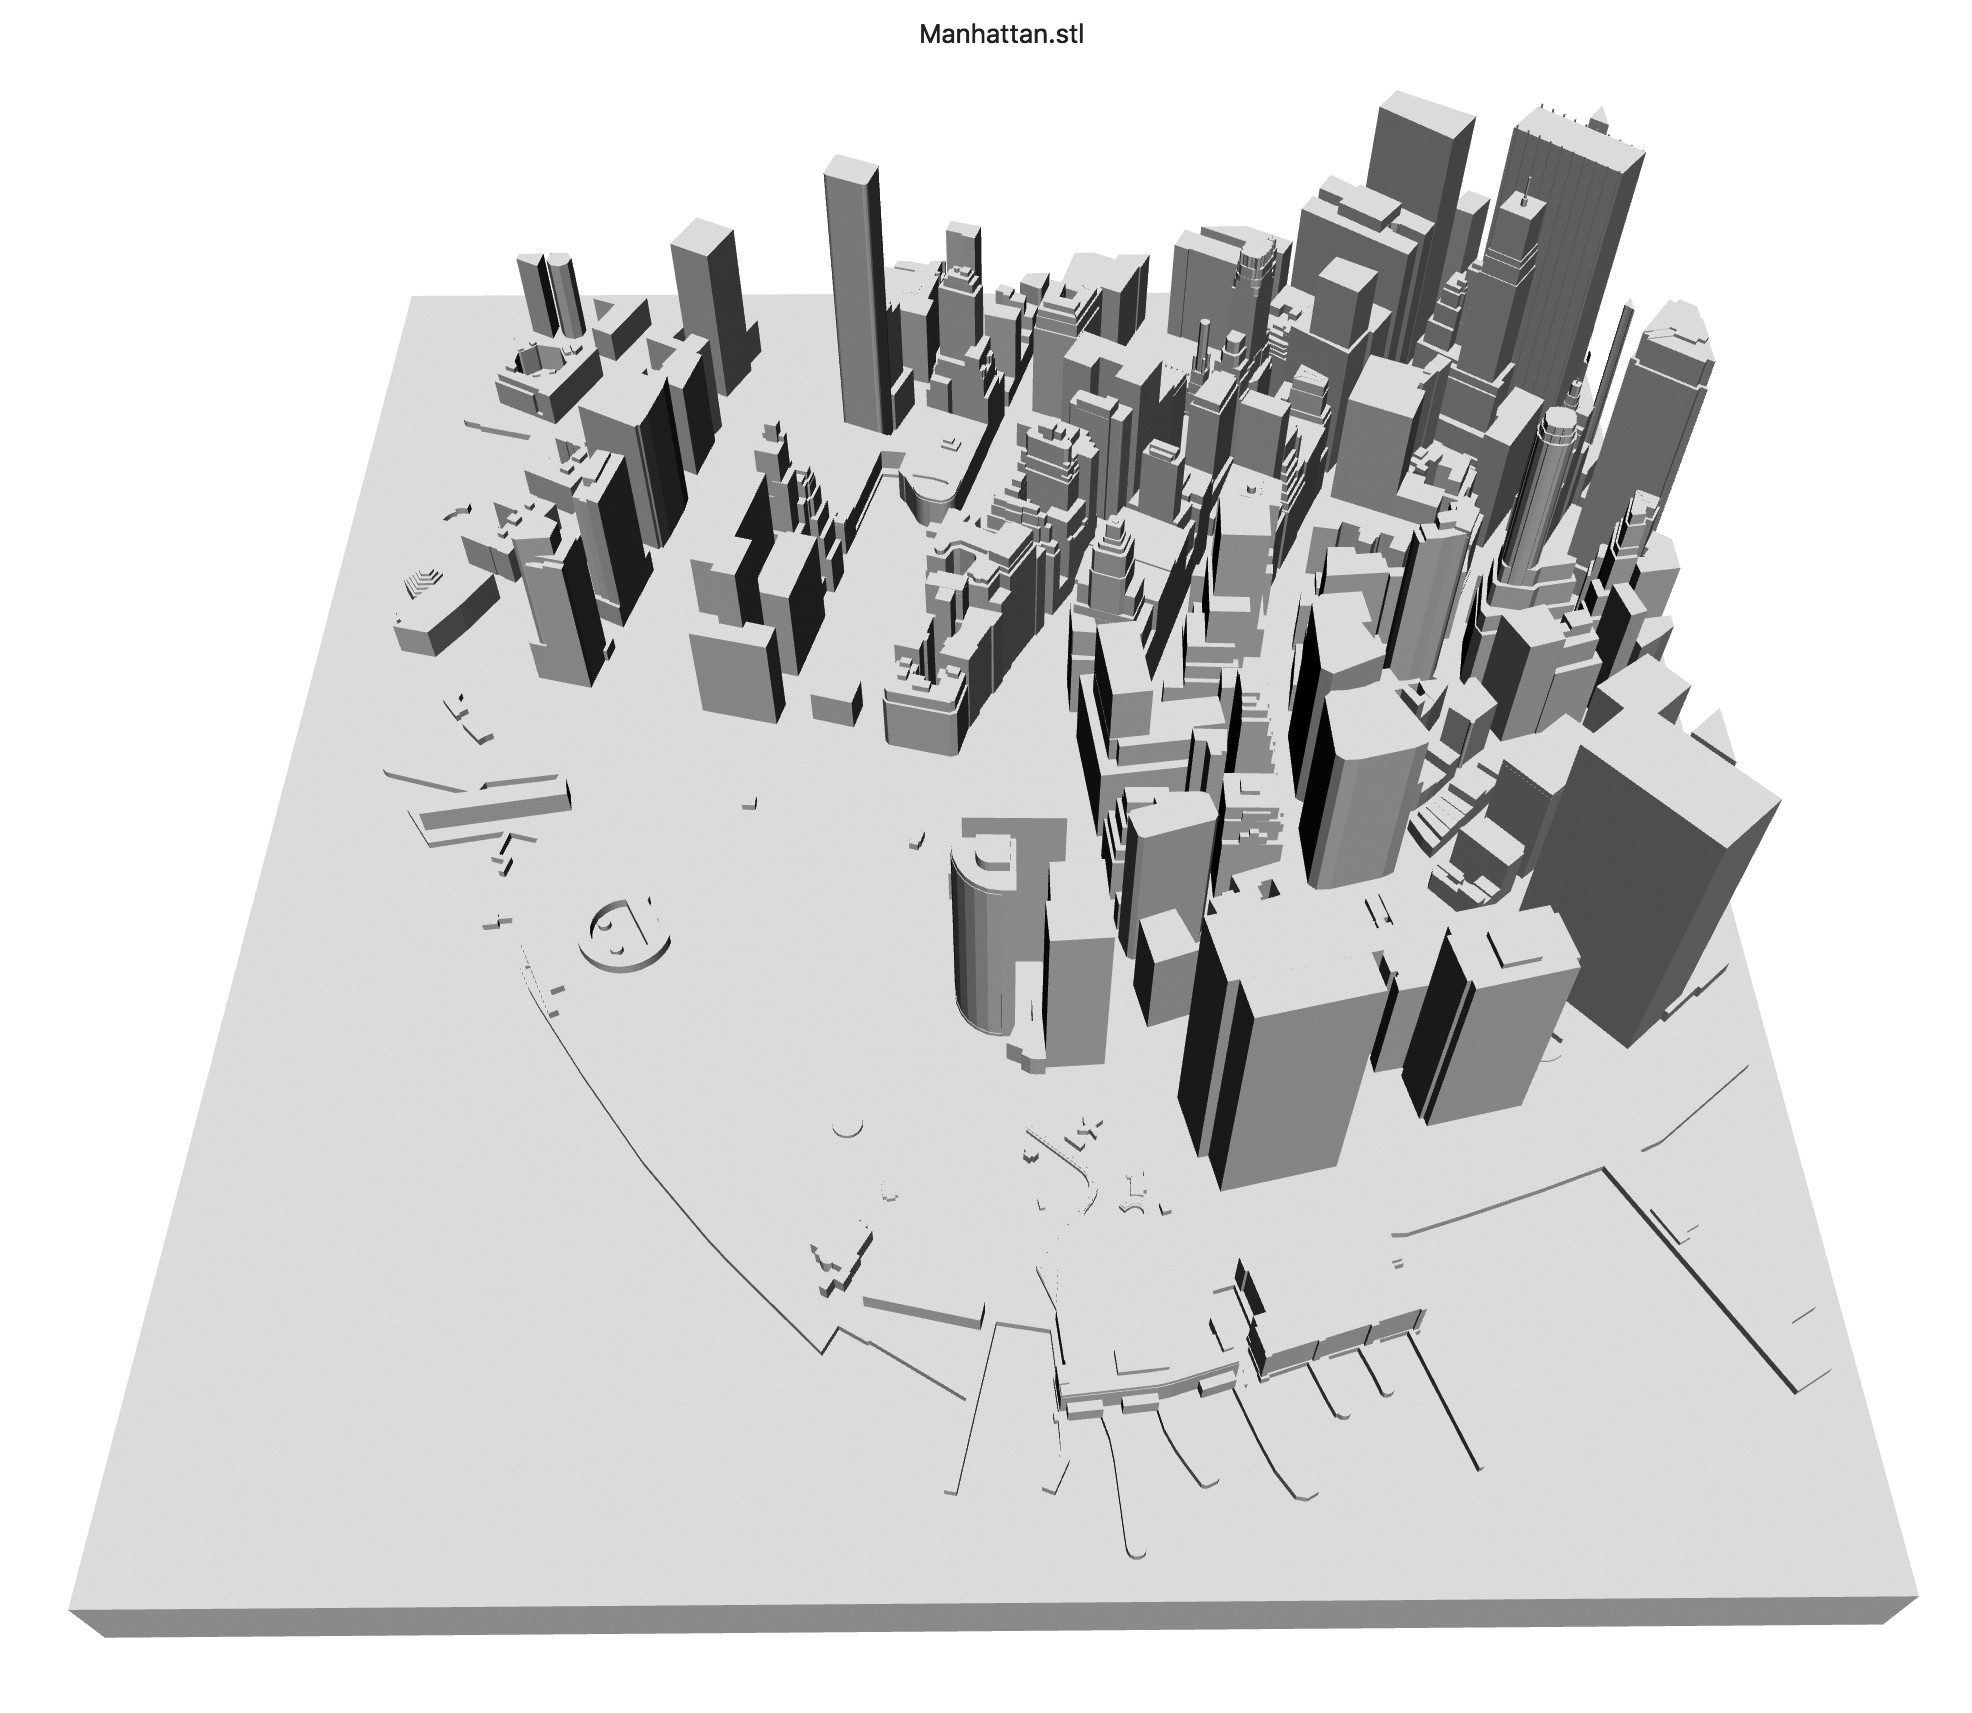
To produce the files needed to run automated machinery the proper file format must be created. These file formats differ slightly when preparing your model for either 2D or 3D printing. Typically for laser cutting (movement in the X & Y direction) the files are created in vector-based software. Once a 3D CAD file is finalized the file has to be saved as a STL file. The STL files are then typically opened in a ‘slicer’ program.

Shown above is a slicer program called CURA.
The slicer program will typically show you the actual filament layers that a 3D printer will follow.

The slicer program will then convert your STL file into G-code, which drives most model making machines. G-code is a language in which people tell computerized machine tools how to make something. The fabrication is defined by g-code instructions provided to a machine controller that tells the motors where to move, how fast to move, and what path to follow.
Affordable Model Making Mechanized Tools for Architects and Urban Designers
Before spending your money on any computer driven tools I recommend you research if there are any maker-spaces in your area. Where I live there are 3D printers, laser cutters, and CNC machines available in some of our local public libraries, and on the campuses of a number of our nearby universities. These are free, but you have to supply your own materials. They also provide free instructions on how to use the equipment, and software.. Going to a maker-space will let you try out the machinery prior to buying expensive equipment. It will also allow you to determine which are the best tools you need to produce your model.
• Laser-cutters
If you want to purchase a laser-cutter that is powerful enough to cut through model making materials, you will be spending between $2,500 – $6,000. There are a number of cheaper models on the market, but through my research you will more than likely be spending a lot of your time calibrating these cheaper machines, as well as making repairs. If you do decide to purchase a laser-cutter I recommend the Glowforge. It’s compact enough to fit on a large desk, is well designed and dependable. The overall exterior dimensions are 38″ x 20.75″ x 8.25″ (965mm x 527mm x 210mm) and weighs 50 lbs (25 kg). You can also purchase an air-filter that attaches to the bottom. Its dimensions are 38″ x 20.75″ x 7″ (965mm x 527mm x 178mm) and weighs 25 lbs (11 kg). If you do purchase your own laser cutter you will need to be able to ventilate the machine, or filtration. The web-site Tested has a review of the Glowforge.

• CNC Machines
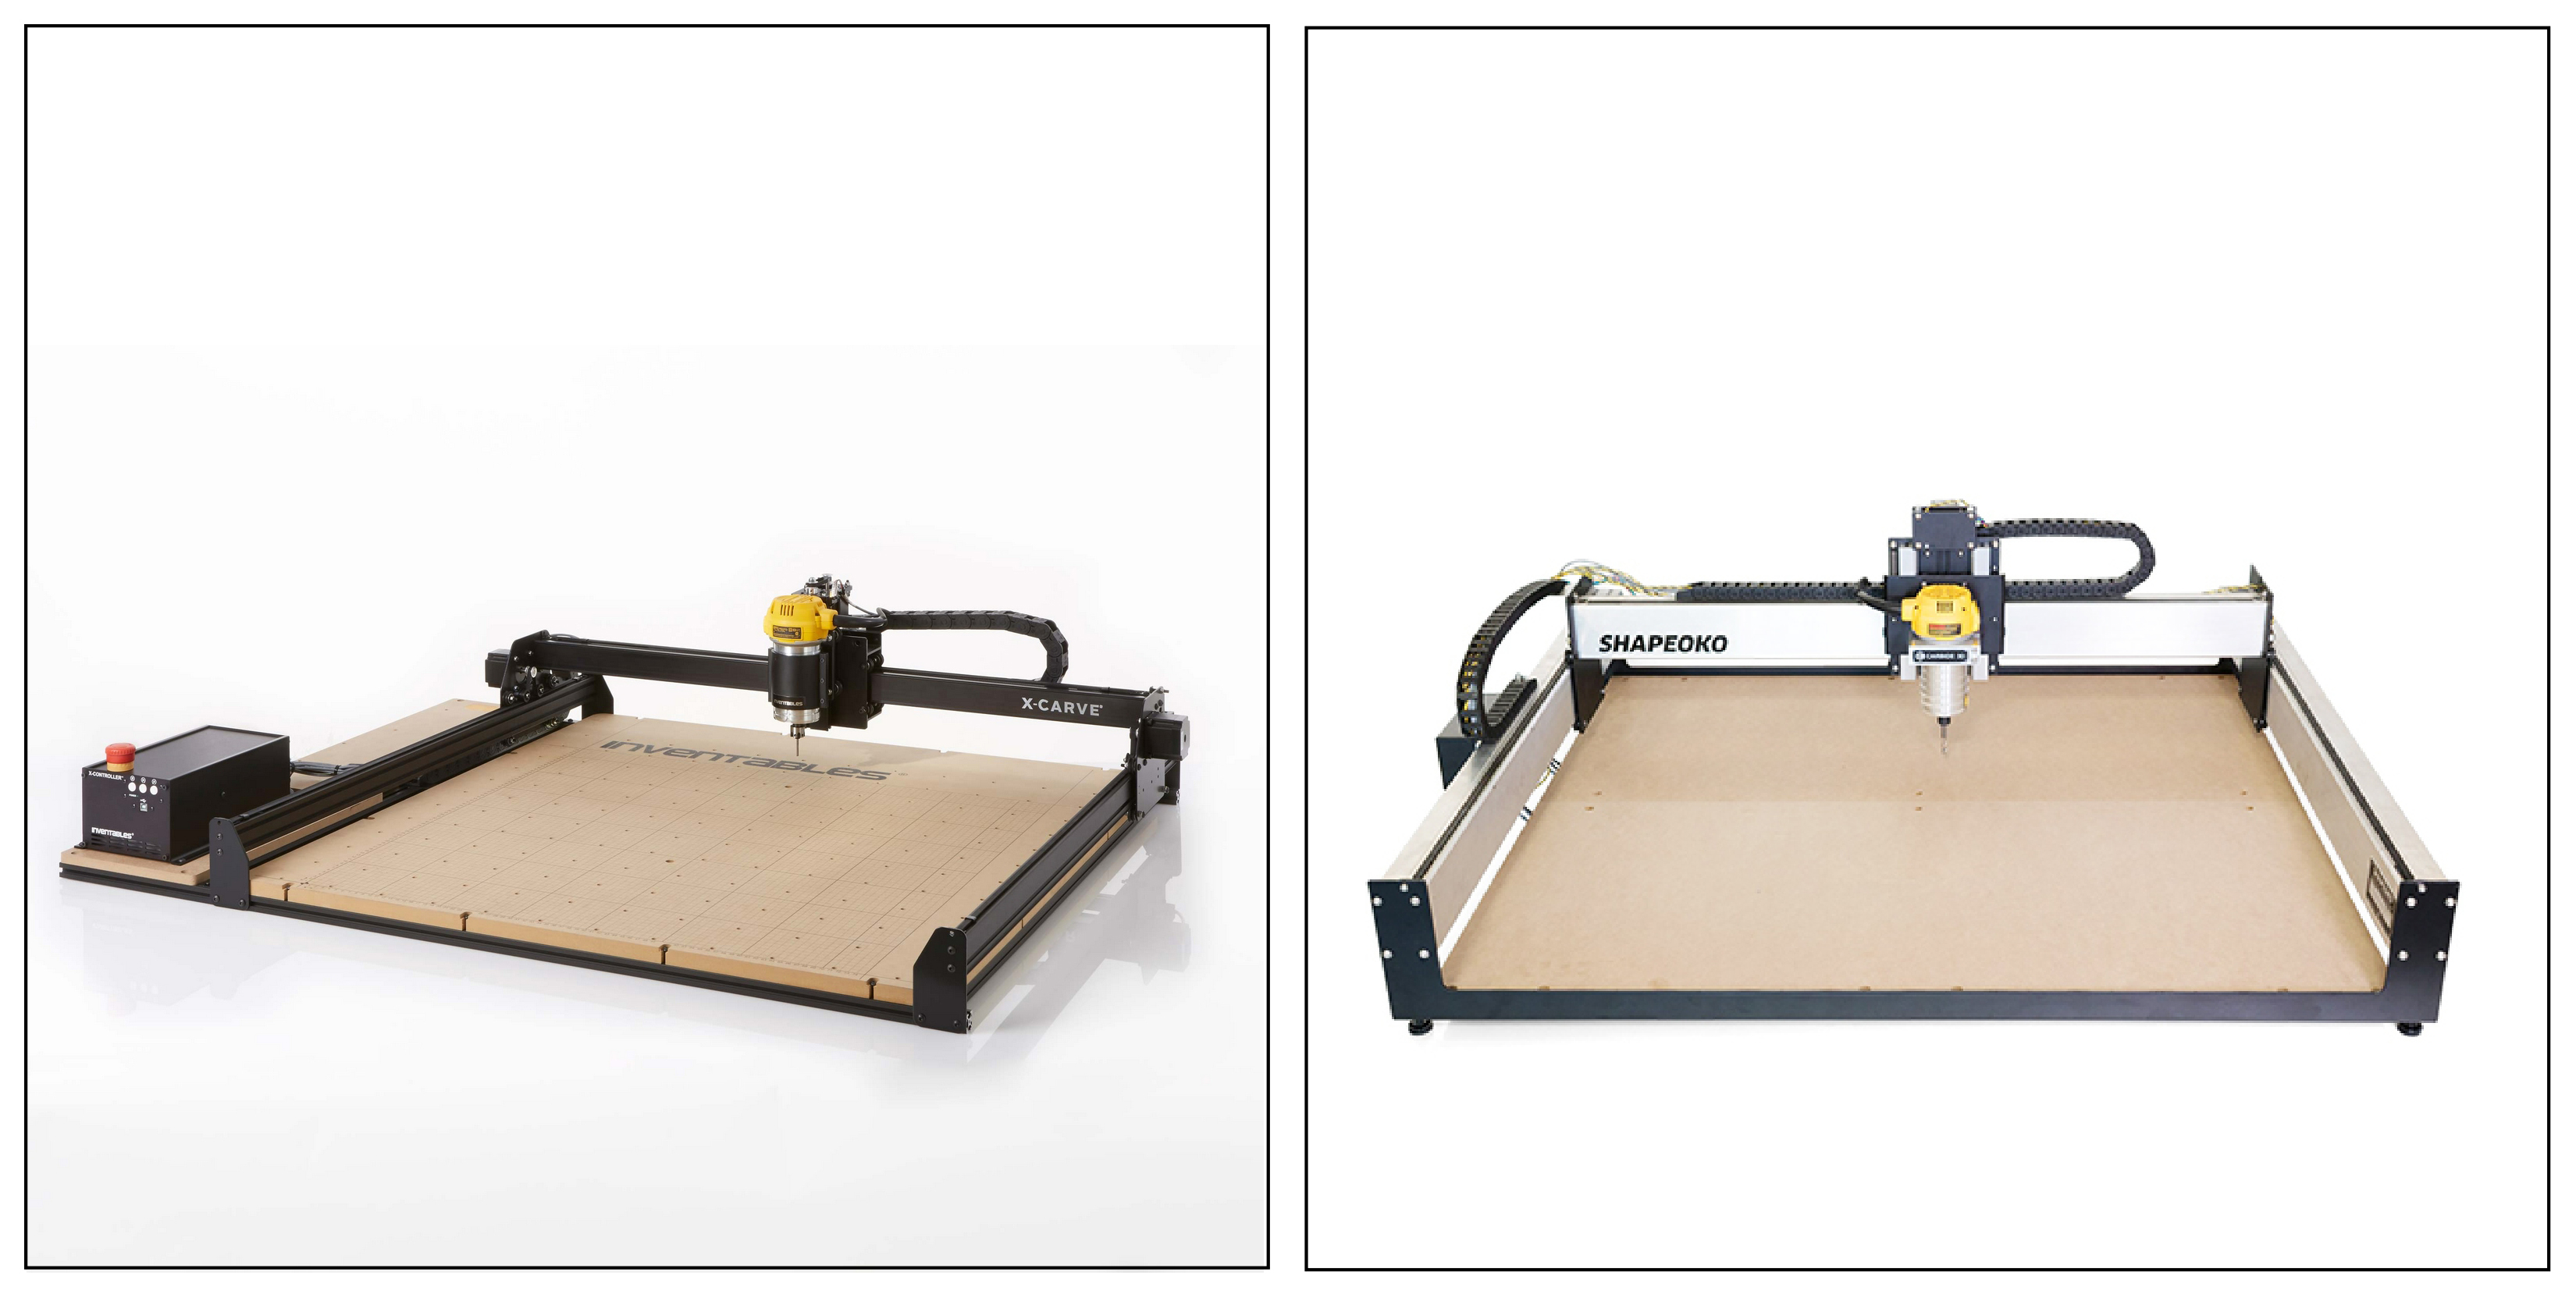
CNC router machines are a bit less expensive than laser-cutters. Although they are most commonly used for cutting in the X & Y direction, some are able to cut in the Z direction as well. There are two small shop versions I’d recommend. The first is the X-Carve by Inventables , and the second is the Shapeoko by Carbide 3D.
The footprint for the largest X-Carve is 49.22” x 39.38” (1250mm x 1000mm), the cutting area is 29.5”(X) x 29.5”(Y) x 2.5”(Z) (750mm x 750mm x 65mm), and the weight is 100lbs +/-. The price at the time of this posting is $ $1,661, +/- depending on the add-ons.
For the Shapeoko XXL the footprint is 44.8″ x 40.3″ (1138mm x 1024mm), and the cutting area is 33″(X) x 33″(Y) x 3″(Z) (838mm x 838mm x 76mm), and the weight is 150lbs. The price at the time of this posting for the Shapeoko is $ 1,830. In both cases I’ve quoted prices from Mackhackers, where shipping is free in the US.
Although more expensive, I prefer the Shapeoko, which is sturdier, and faster. Note that both of these models are not enclosed. A vacuuming system will have to be attached, which both companies provide.
• 3D Printers
Out of the three types of model making machinery, the 3D printer has become the most affordable. 3D printers have begun to show up on architectural student desks, mainly due to the drop in cost, but also because the majority of the printing material doesn’t need to be vented, nor does it create a lot of dust. Another major factor for using 3D printers are the types of designs being made that are almost impossible to make by hand, i.e. Parametric Designs.
The affordable 3D printer I recommend for high quality output is the Creality CR-10. This printer can be found for around $360, and has a larger printing area, 11.8”(X) x 11.8”(Y) x 15.75”(Z) (300mm x 300mm x 400mm). than the majority of printers for a similar cost. The CR-10 will take some assembling when it comes out of the box, and will also need a lot of tweaking to get a decent print.
If you are a novice, and you don’t have access to a maker-space that has the equipment I discussed above, I suggest you watch instructional videos.

As a Final Note
The equipment I’ve discussed above will not always produce a completed model. I highly recommend you have on hand the following.
- Professional Self-Healing Cutting Mat, the larger the better
- An X-Acto knife and a pack of 100 #11 blades
- 9mm Olfa Knife
- Small scissors
- A Stainless-Steel Metal Ruler, 24 inches, for measuring and as a cutting edge
- SOBO glue & a Glue Syringe
- Super Glue
- Kicker for the Super Glue (note: these are highly toxic, and you must follow the directions when using)
- Blue painters’ tape (this tape will usually not tear paper surfaces when removing)
- Straight pins (to hold pieces in place while glue dries)
- A working area with bright lights and good ventilation
Feel free to contact me if you have any questions or comments.
